I've been sharing details about my latest Miss Manners Cupcake Party with you this week. Today I want to show you how (and why) I made the sweet little paper cupcake stands below. After all, it was all about cupcakes that day!
I looked online and you can find a lot of these in various forms but they were expensive to buy ready made. I went on Pinterest and saw some made from mini terracotta pots for the base, and that's where I got my idea.
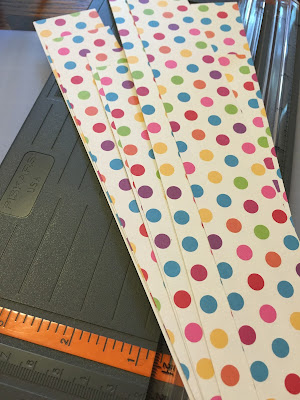
I began by cutting strips of scrapbook paper for the skirt. These began as 12"X12" pieces of scrapbook paper. I cup them 1.5" wide and kept them 12" long. To do this quickly, I used my paper cutter.
Next I used a border punch from Stampin' Up to make a pretty scalloped edge. OK - I have to say something here. I love Hobby Lobby. I mean I REALLY love them. I can't stand to see a good 40% off coupon go to waste! I love to shop there and I appreciate the stand they're making for traditional Christian values. I shop there so often, the cashiers know me by face if not by name!
Anyway - I love to stand in front of their wall of paper and just mix and match and imagine projects. And I always wait until that one week every month or so when the paper goes 50% off. But folks, you get what you pay for. Who would think that there could be cheap scrapbook paper? Well - there is. My cut scalloped edges were not nearly as sharp as when I use this punch on Scrapin' Up paper. I still love to pick out my pretty papers, so I guess it's a little bit of a trade off.
Next, I took a 4" cardboard cake circle and traced it around about a 1/4" all around.
Next I cut that out and then used that one as a template for the rest.
I used my tape gun to add a little adhesive around the edges of the circle.
Then did the same thing to the scalloped strip of paper, being sure to leave a little space at the top.
Then I carefully wrapped the strip around the cardboard round and joined the edges together. I had also added a little adhesive to the ends so they would join.
Next, I started above the join and pressed the excess paper from the scalloped strip down into the adhesive I had put on the cardboard round. It made a pretty crimped design on top.
Finally, I took a couple of pieces of rolled tape and used it to stick the top to the white paper Dixie cup. (I had to order the white cups on Amazon, and I got a couple hundred or so, but they were still cheaper than the old lady design I usually find at Walmart! We use them anyway, so no great expense.)
There you have it! Isn't that sweet? And I would say that they probably cost less than .50 cents each!
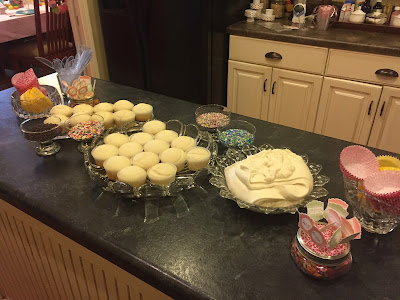
So why did we need cupcake stands? Well - it was a cupcake party! When the girls arrived, I had set up my kitchen island with everything we needed to decorate cupcakes. I had two cupcakes made for each girl, a lot of buttercream icing, sprinkles, plastic knives and extra cupcake wrappers.
I also made some little cupcake picks that read "Just for you". I took a short mason jar that I have filled with pretty pastel buttons and instead of a lid, I stretched one of the cupcake wrappers and screwed it down with the lid. Then I was able to poke the picks through the wrapper. I made two picks for each girl.
I also had a bowl of extra wrappers. I had baked the cupcakes in white papers. Unless you buy the ugly foil wrappers, once the cupcake cooks, you can see the baked cake through the wrapper, so I always place my baked cupcakes in a second wrapper. I spread the second wrapper so it looks a little like a little skirt or tutu. It just makes it prettier!
We talked a little about decorating cupcakes before we began. I also reminded them not to lick their knife before they were done. No double dipping! I also explained why I use two wrappers. You can see them eying the cupcakes. It was hard to keep them from diving in, so I just had to turn them loose!
I felt they could probably control the sprinkles better (and not waste them!) if they pinched and sprinkled. We had washed our hands before we started, so I let them dig in.
We had so many that I had to divide them into two groups. But there was plenty for everyone! The moms even got to decorate their own.
Each cupcake was a work of art!
They were remarkably well behaved to have been turned loose with all that sugar!
They were quite focused as they worked.
Here I am demonstrating at the beginning before they got to do their own. I think their expressions speak for themselves!
I caught one licker, but she was done with her decorating!
I had them decorate two cupcakes. They put the picks with their names into the cupcakes and put one at their seat on their cupcake stand and left the other in the kitchen.
OK - here's the photographer fail moment. I forgot to tell someone to take pictures of this part while I was with the girls in the dining room. But while they ate, my mother and Nancy took their "extra" cupcake and placed it in a plastic punch cup, and then dropped that into a clear plastic treat bag. They then tied the bag up with a piece of curling ribbon. It was so cute! Trust me! They took these home, along with their cupcake stands.
I used my Stampin' Up stash to make these picks. I stamped them, then used a matching punch to cut them out.
Then I used my adhesive (which doesn't really show up here) to attach the toothpick and join the front and back piece.
Here's the finished project!
And just in case you missed it, you can find my classic cupcake and icing recipes here.
I'm gonna take a couple of days off because Jewell's 13th birthday party is tomorrow night and I have about a zillion things to do! But next week, I'll wrap this party up and show you the crafts we did. I hope you have a great weekend!
I'm so glad you stopped by my neck of the woods!
Please take a moment to sign up to receive new posts by email.
I wouldn't want you to miss one crazy thing...


No comments:
Post a Comment