Check out my Crafts and Sewing posts!
Showing posts with label Crafts and Sewing. Show all posts

Sunday, December 26, 2021

DIY Flocked Pine Cones


Pinecones are a natural resource that is in no short supply around our house! We live in the middle of 10 acres of pine trees. I have more than I can handle! (Feel free to come pick some up if you so desire...my kids will be glad of the help!)

I love the natural look of pinecones, especially since they're so much a part of our home. I have found a way to use them that is safe and sanitary. I love using them in tablescapes or in baskets as part of my seasonal decorating, but I don't want any sap leaking, and I definitely don't want any creepy crawly bugs making their way out as we dine by candlelight! Simple fix...bake them!


I place them on half sheet pans and bake at 225-250 degrees for about an hour and a half. This low and slow method dries them out without making them brittle, and it kills anything that might have tagged along inside.


Once they're completely cool, I lay down paper and use snow spray to flock them. I picked up several of these spray bottles during 75% off clearance at Walmart one year. They were maybe $2!


I let it dry between layers. It's easier to build the coverage that way. I want them to look like they've been sitting in the snow, so I don't move them. I spray down from a slight angle, just like snow would hit them. I add a little more as needed. 


I store them in a box in my attic with my Christmas decor. Most make it through with no trouble from year to year. If I lose any, no biggie. I just grab some fresh ones and start the process over again! They really are a lovely addition to my decorations. The white really helped them to stand out. They would have been lost on the dark blue runner if they were their natural brown color. This is a fun, natural, low cost way to decorate!

 I'm so glad you stopped by my neck of the woods!
Please take a moment to sign up on my homepage to receive new posts by email.
I wouldn't want you to miss one crazy thing...
 

Tuesday, August 7, 2018

Whale Pillow - Summer Sewing School July 2017


We had an unusually small class last July 2017 for our second Summer Sewing School session. I think a lot were away at camp. No matter! We made a PRECIOUS little whale pillow.


As usual, Nancy explained the project. This one was a little tougher. First - sewing on minky fabric can be a little difficult in the beginning. Second, the shape itself presented a challenge. Finally, they added a little bit of pom-pom trim. Never fear, though! These girls have been doing this for years! They picked up very quickly.


Small class or not, the girls had fun. And the mamas usually comment that they learn something as well!

I'm so glad you stopped by my neck of the woods!

Please take a moment to sign up to receive new posts by email.

I wouldn't want you to miss one crazy thing!


Tuesday, July 24, 2018

Beach Towel Bag - Summer Sewing School June 2017


I'm behind - I mean WAY behind - on posting. We've already had sewing school for this year, and I still haven't posted about the classes from LAST summer!

I also have to apologize for lack of detailed pictures of this project. Sorry. When it's my turn to teach, I forget to ask for specific pics. Anyway - we made a cute beach bag out of beach towels. These are great for carrying all your summer stuff, they can be thrown in the wash, and we even used the leftover scrap we cut away to make a cute little bag for wet swimsuits.


We always take a minute to explain the project before we begin. That way - big questions can be answered to benefit everyone.


We also show a sample of the project. I found the towels at Walmart in several colors. I let them choose their color when they signed up.


These two ladies, y'all - my mom up top, and my friend and cohort, Nancy in orange - these two ladies taught me just about everything I know about sewing, crafting, cooking, and entertaining! I'm so glad they do all these projects with me.


We usually have five or six ladies from our congregation to serve as mentors. They bring their machines and help the girls learn all the basics.


I always enjoy the classes because it gives me a chance to get to know new ladies at church. Hobbies are a great way to meet new people!


We usually mix it up and keep mamas and daughters apart. It's nice to learn from different people.


That's my girl right there. She loves to sew. She's been known to stitch paper towels when I was too tired or busy to find her what she wanted for a project! I really should go back and check, but I think this summer is our FIFTH year of Summer Sewing School. I'm so glad we do this. It's such an important (and dying) skill. Even if these girls don't end up making their own clothes, they'll at least know how to replace a button or sew a hem!

I'm so glad you stopped by my neck of the woods!

Please take a moment to sign up to receive new posts by email.

I wouldn't want you to miss one crazy thing!

Friday, April 14, 2017

Craft Closet Makeover - Step by Step Tutorial


Today I'm walking you through the process of how I made my craft closet. I was needing a space where I could craft and then close it off. No "rooms" were available, so I took the closet that was stuffed full of my supplies and spiffed it up a little!

I began by making a list of the items that would go in my closet, and then I started looking on Pinterest for ideas.


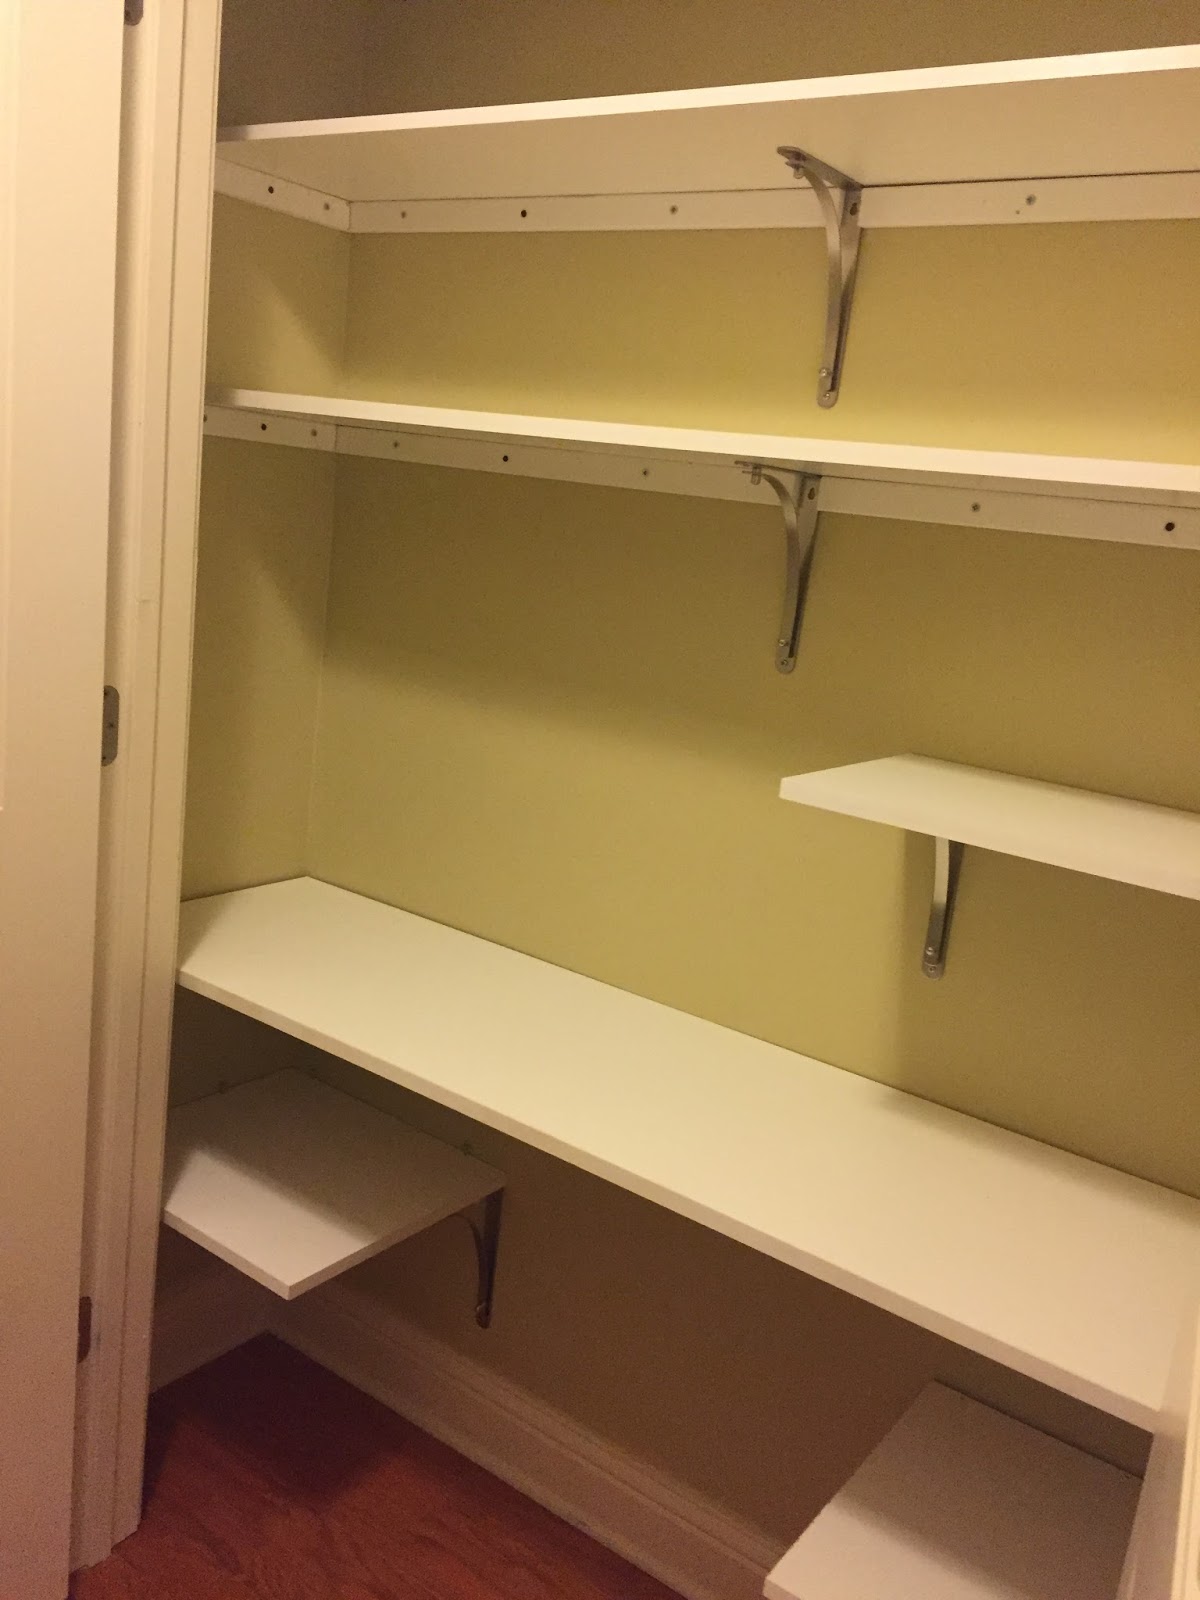
Here's the before...


It held everything, but it wasn't easy getting it out or back in!


I began by taking everything out. This gave me a chance to inventory what I had. Now I keep a list of the stamp sets, ink pads, etc. on my phone so I don't end up buying the same thing twice!


I removed the shelves and brackets. These went into storage in the attic. Who knows. Maybe I'll get the kids' playroom one day to use as a craft room! Then this could be turned back into a closet.


I patched holes and repainted the closet. Believe it or not, we still have paint left over from the build, and it was unopened!

Here's the part you can't see. I spent several hours one Sunday afternoon at Home Depot getting all the wood cut to order. I had drawn up the plans myself. I checked and double checked everything, then had the guy cut them. I think they'll make one or two cuts free per piece of wood. Be sure to catch them when no one else is there...


I used pine, so I primed it then painted it with more leftover paint - "Navajo White" by Sherwin Williams. This is what all the trim work in my house is painted.


I took the time to find where all the studs were, then I used deck screws to secure the pieces to the wall. I tried to be sure to secure through studs whenever possible, in fact, I only went into the studs. It was just a matter of how many times a piece of wood intersected studs. The more, the better.

This is a brace to hold a shelf. All the shelves were braced by wood and brackets to make them stronger.


My holes were not pre-drilled. It was all up to me. I made sure to keep the extra drill battery charging at all times.


I keep thinking my parents will give me my own drill for Christmas since I keep borrowing theirs!


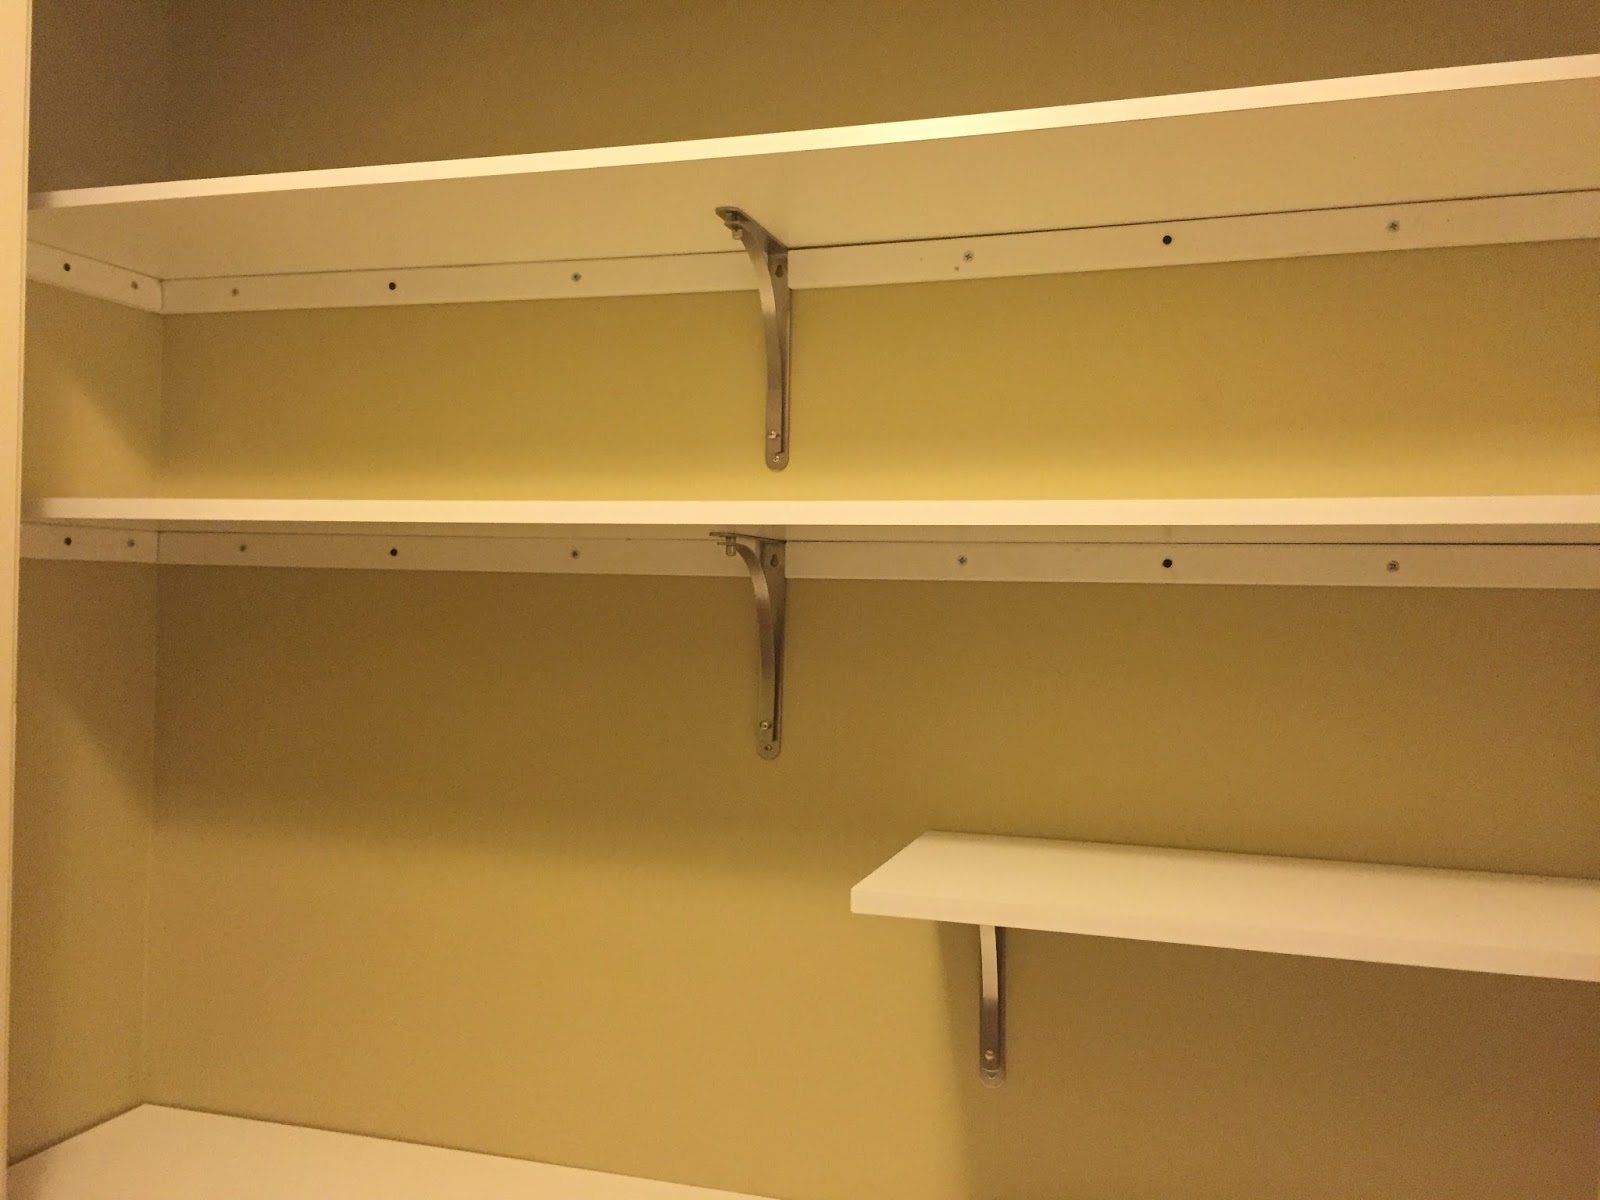
Here are the top wood braces and a bracket to support the top shelf. I really wish I had done two braces, but that shelf just holds the shoeboxes, so it's been fine so far. 


For shelving, I used melamine. More on that later. Brackets also went directly into studs.


I really did the whole things myself - design, purchase, oversaw the cutting, painting and installation. Jewell took photos for me as I went, and she did hold the wood braces level so I could screw them in. Girl power!


Top two shelves installed.


As I said, I used the melamine shelving. It is lighter than solid wood, and it has a surface that is smooth (for writing) and wipes clean. It was cheaper, too! I used this melamine edging tape to finish off the edges. 


Measure for length and cut about 1/16" longer.


Line it up on the shelving. (The edges are a little rough from cutting. These sides face up near the top and down near the bottom, so no one is any the wiser!


Using a hot iron and no steam, cover the melamine strip and apply heat and pressure.


Doesn't that look great!?


About halfway there!


In my design, I made sure to leave space for my ink corral (an old cassette tape organizer) on the left side. I already knew where everything was going.


I stole this cool acrylic chair from Brack's room, but he was having none of it. Oh well...


I intended to go back and paint over my screw holes, but I haven't yet. Once everything was loaded in, they weren't as noticeable.


A handy half shelf.


It's hard to see, but the shelves are not as deep as the desk. The desk fit perfectly into the space. I wanted the shelves a little more narrow so I could reach things while seated and working.

Design took me a week to work on. I wanted to be sure it was the best use of space and that it was right dimensionally before I bought materials and had them cut. Purchasing and cutting took most of a Sunday afternoon. Painting took a day - not a whole day, but I would prime, go do something else and come back. Paint a coat, leave and do something else. You get the idea.

Installation took the better part of a Saturday. So all in all - it was a three day job!


I have soooo enjoyed having a home for all my crafting. It's wonderful to know where everything is and be able to put your hands on it immediately!


Full disclosure...It doesn't look like this right now! I'm working on invitations for Brack's birthday party, but it doesn't matter. I just close the doors!

I'm so glad you stopped by my neck of the woods!

Please take a moment to sign up to receive new posts by email.
I wouldn't want you to miss one crazy thing...


Friday, April 7, 2017

Craft Closet Makeover - The Reveal!


I do a lot of sewing and crafting. Paper crafting is one of my newest hobbies, and I've already accumulated a good bit of...stuff! 

Today I want to give you a tour of my DIY Craft Closet. Here's what I have come up with to not only organize my stash, but give me a place to work and then close off when needed. 

I'm still trying to catch up on my posts, so while this is new to you, I've had it since last May. This was actually my Mother's Day present to myself!


Here's a view of my hallway. The door at the end is the office. Brack's room is at the end on the right. Jewell's room is on the right too, but just before the pic begins. Each of the kids have a large closet, but when we built, we decided not to use their bedroom closets for their clothes, but for "mini playrooms". Jewell had her big wooden kitchen set in hers, as well as her Barbie townhouse. Eventually, Brack's was filled with workbenches and dragon castles. Both have a toy chest in their closets where we kept their dress up clothes. I will find a pic of this soon and share it with you. It was really cool!

We were able to do this because we have these two large closets outside their rooms. We used the first one on the left for their clothes for years. The second one is my sewing and fabric closet. It's only been in the last few years or so that we moved everything out and hung closet doors in their room. 

So, what to do with their old clothes closet? Well, here's how it used to look...


All my stuff got crammed in, and I had to dig through, find what I needed and then work somewhere else like the kitchen or dining room table. And then it had to be cleaned up before we could sit down and eat!


So - I decided Mama deserved her own craft room. Well, all rooms are being used, so a closet will have to do! I'll do a separate post showing you how I did it, but for today, I'll just give you a tour.


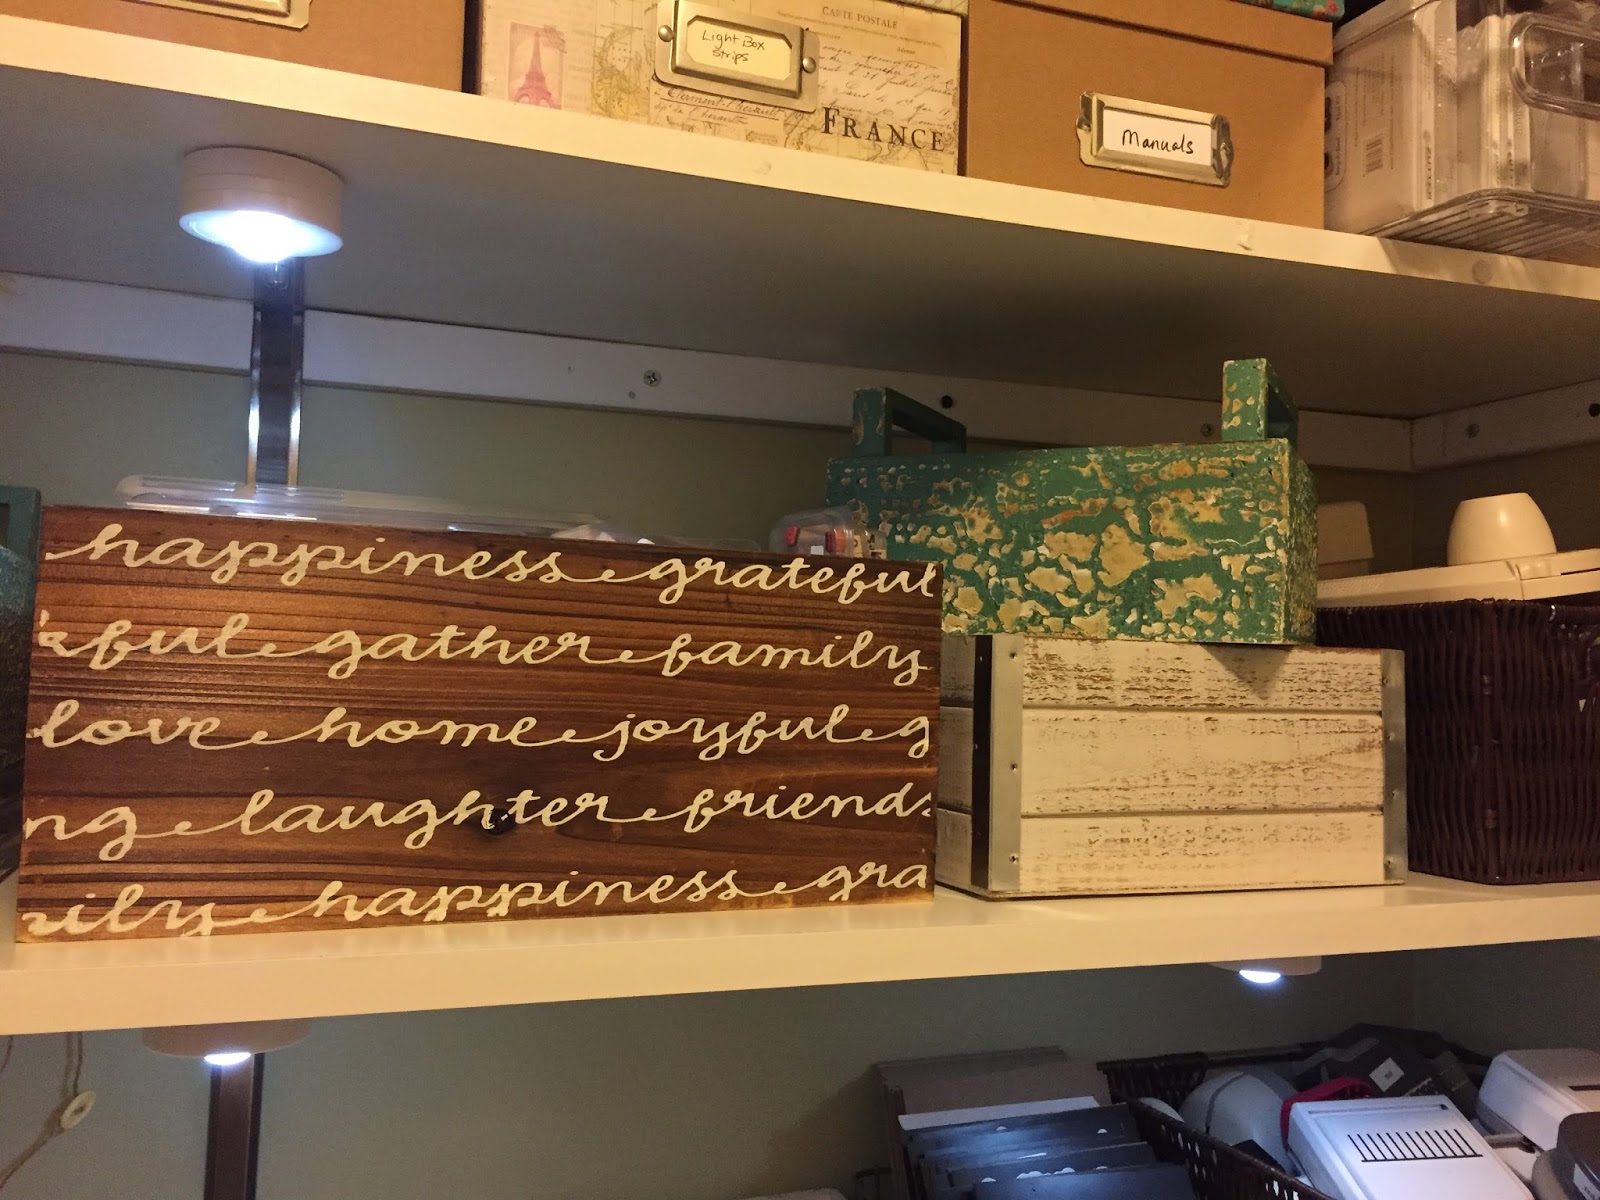
Up top I have a bunch of pretty shoe boxes. I had a couple already that were empty, but I needed more. Michael's and Hobby Lobby both run these periodically for .99 cents, so I stocked up. I tried to get several patterns that coordinate. This is where I store extras and things I don't use everyday.


Here's a view of the left side.


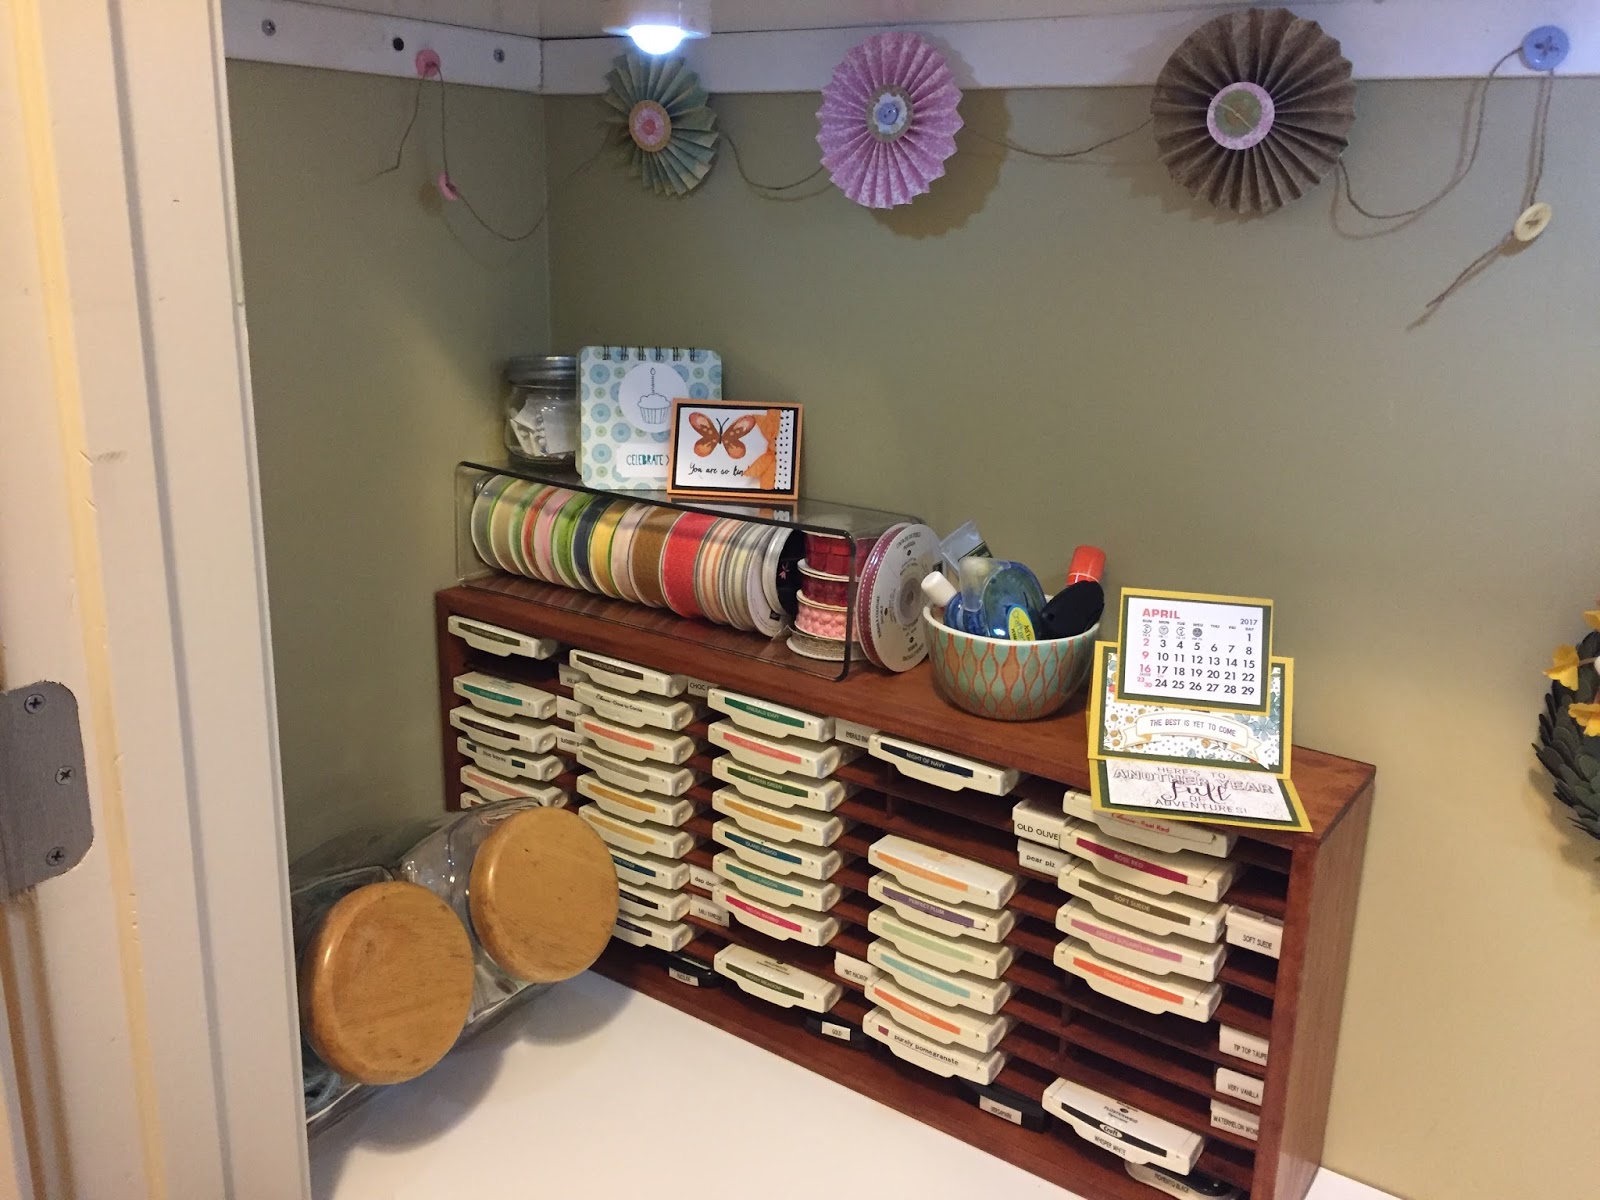
Ink and ribbons are found on this side.


I found these two glass containers for .50 cents each at a Friends for Faulkner yard sale. They're perfect for holding smaller rolls of ribbon and twine.


This old cassette tape organizer is perfect for holding all my ink pads. I had JUST thrown away two of these when I got the idea for this on pinterest. Oh, man!  I found this one on ebay for a couple of bucks. With the shipping, it cost me a total of $12.


The clear box above is actually a refrigerator drawer organizer. I paid about $5 for it at Lowe's. It holds my larger rolls of ribbon. The little mason jar above contained homemade red hot candy and was a Christmas gift from one of my homeschool co-op kids. 


The pretty little bowl came from the clearance aisle at Hobby Lobby and was .79 cents. It holds my adhesive, lotion, and other daily necessities.


I even tried to decorate with some of my past paper craft projects. This dainty paper flower garland was one we did at a Miss Manner party years ago. Here's a link to it. 


This was a Paper Pumpkin project I did last year.


Here's the right side.


Pens and more embellishments are stored here. You can also see the little under cabinet lights I installed here. I found these at Costco on sale. There were six in a package for about $15. My closet doesn't have electricity, so I have to rely on these extra lights along with the overhead light in the hallway. 


I used a 40% off coupon and got this pretty pen and pencil holder for about $5 at Hobby Lobby.


This magazine holder was on clearance at Hobby Lobby for about $5 as well.


Another .50 canister holds all my washi tapes.


This was a little of a splurge, but I love it! Here is where I keep a lot of little buttons, brads, etc. to use as embellishments. I spent $20 for the magnetic board which already had screw holes in it to mount to the wall. The little magnetic canisters came from Dollar Tree. They are two for a $1, so I have $28 invested in the whole wall project. It keeps things at hand, but out of the way. Love it! 


I got this basket half off at Hobby Lobby. It's perfect for holding my stamp sets. 


These little distressed green boxes came from the Hobby Lobby clearance aisle for about $4 each. This one holds my embossing folders.


The brown box above on the left came from Michael's and was on clearance for $5. It and the white box hold loose wood mount stamps.


This little wire basket was already in my collection. I use it to hold my metal die collection. Several sites sell these magnetic cards to hold the dies, but they are ridiculously expensive! I ordered 5x7 cardboard cards and 5x7 magnetic pieces and made my own for a fraction of the cost.


I already had these brown baskets under my TV holding DVDs and old VHS tapes. Yep - it was the perfect time to clean that out and re-purpose these great baskets! They're strong, and they hold my punches. This one mainly has whale tail punches with a few miscellaneous ones on top. 


This smaller one holds the box punches. These are much heavier, so luckily, they fit in the smaller box.


On the floor is a basket I already had. It is full of all of my Stampin' Up catalogs that I use for inspiration. I also stick my huge Scotch Advanced Tape Glider here. It's too big to go anywhere else!


 On the left bottom you will find my Sizzix Big Shot and all it's accessories.


Below that is half of my paper stash. I already had these boxes. The white mesh wire trash can came from Dollar Tree!


You can see it's a little dark underneath the desktop. I didn't add pot lights here because this is just a storage area. This stuff, like my Big Shot on the other side, has to be brought up to the desktop to use. This side holds all my paper trimmers and punch boards.


The rest of my paper stash is on the left bottom. I divide these by broad color schemes.


Faulkner was redoing it's computer lab last year and was getting rid of these chairs for $5 or $10 each - I can't remember. Anyway, they are in GREAT condition. My sweet husband bought two. It is perfect for this space and is very comfortable. The only negative is that the closet is about two inches too narrow to close with the chair inside, so I just leave it in the hall when I 'm not crafting. (The kids use it regularly to push the cats around the house, as it is a favorite napping spot for our two fur balls!)


There you have it! It ain't huge, but it's mine, and I love it! And did I mention I built it? The whole thing. BY MYSELF! I'll show you how soon. All said, I have less than $250 in supplies for the wood and storage containers. This pretty and organized space really lets me get creative!

I'm so glad you stopped by my neck of the woods!

Please take a moment to sign up to receive new posts by email.
I wouldn't want you to miss one crazy thing...
SITE DESIGNED BY PRETTYWILDTHINGS