
Check out my Homekeeping posts!
Showing posts with label Homekeeping. Show all posts

Tuesday, February 28, 2017

Reconditioning a Cast Iron Skillet


When we built our home eleven years ago, we bought a ceramic cooktop stove. I love it! No more messy burners or having to buy new drip pans. However, you can't use cast iron on it. Knowing this, when we moved in, I just left all my cast iron on the bottom shelf in the garage. Fast forward nearly a dozen years...


Gerald and I had both inherited several pieces from both our grandmothers. Unfortunately, several pieces were the same, so I no longer know which came from who. I do remember the corn-shaped muffin pan came from my greatgrandmother for whom Jewell is named!


Between the dust and the rust, these skillets were in pretty rough shape. I wanted to use one for a recipe I made for my Mixing Bowls Cookbook Club last week, so I endeavored to clean it up. I'd read about it, but never done it myself. Would it work? Let's see... 
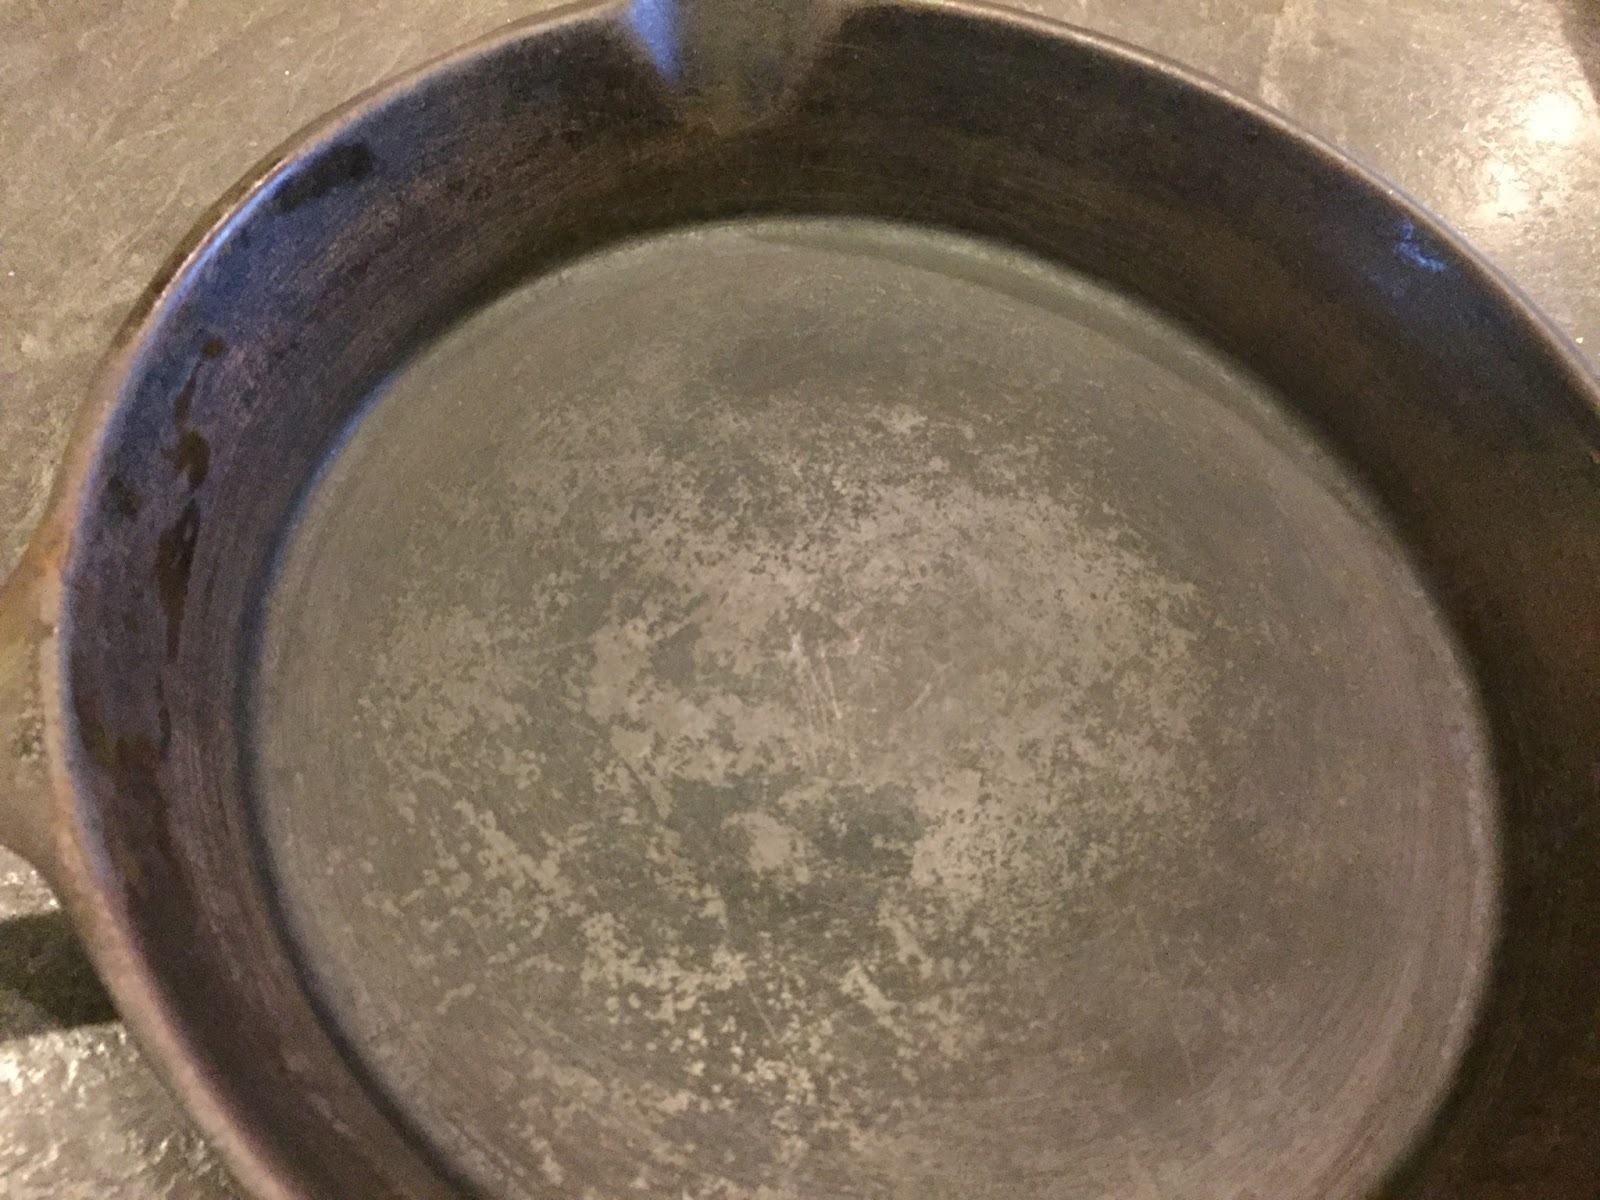

I began by washing it in hot, soapy water. I scrubbed it good with steel wool. Once it is seasoned, you're never supposed to use soap, but since it probably would have given us some sort of lead poison as it was, I had to risk it!


Looking better already! But it was still dried out and unseasoned.


I added about a teaspoon and a half of canola oil to the clean and dry skillet. I used a paper towel to rub it in - really well - all over the inside, outside and handle.


I wiped out the excess.
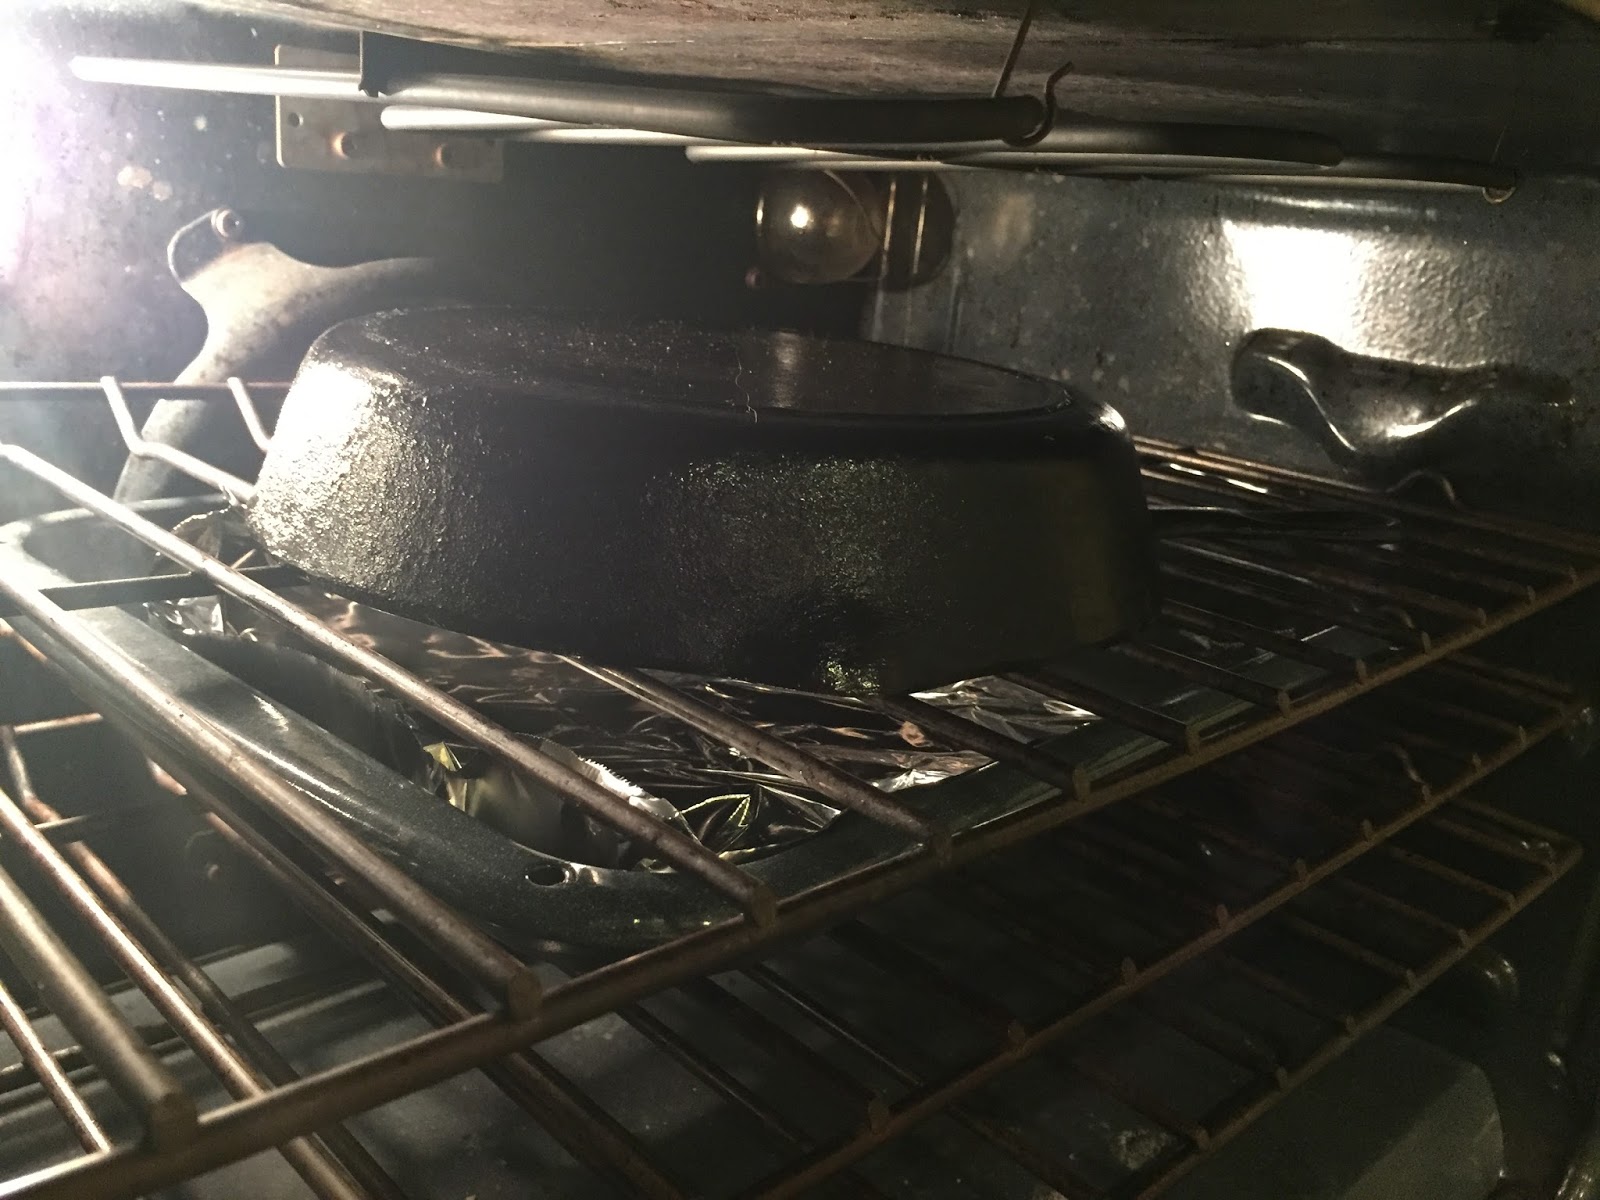

I put it in a 350 degree oven for right at an hour. I placed it upside down over a foil-lined pan to catch any drips. After an hour, I brought it out to cool. Remember - it's screaming hot, but there's nothing inside to remind you! Cover it with a towel and place it out of the way of little hands.


Later on, I buttered it, and made this...


Goat Cheese and Cauliflower Gratin. Delicious, and the skillet was perfect for it!

I plan to keep this one good and clean for cornbread and other casseroles. I also plan to clean the rest when I get time. Maybe display them somehow?

Check back tomorrow for the recipe for the creamy casserole above.

I'm so glad you stopped by my neck of the woods!

Please take a moment to sign up to receive new posts by email.
I wouldn't want you to miss one crazy thing...



Friday, May 9, 2014

Ya' know what I mean, Fern?

As I was watering the plants on my front porch this morning, I thought I'd share with you a little gardening tip. 
 
Ferns on the front porch is a requirement in the South.  If you live below the Mason-Dixon line and don't have at least one, get in your car and drive to your local nursery now.  If not, you are in danger of losing your Southern Belle card.  Don't say I didn't warn you...
 
That being said, ferns are temperamental.  They need sun, but not the hard, late day sun.  They like to be root-bound, but a pot full of roots makes it hard to hold water.  They look best when hanging, but it's difficult (and often self-soaking) to water a plant above your head.  And finally, they are a favorite spot for birds, lizards and snakes. 
 
(Side note: My mama read somewhere that you should put rubber snakes in your ferns and plants to keep birds from nesting in them.  That's all well and good until a real, live snake decides to work for free.  Be sure to check your plants well before bringing them inside.  My parents have found at least three snakes IN their house in the last couple of years.)
 
So how do you take care of such a picky but ubiquitous Southern staple?  Well, I'm sure I didn't invent this technique, but here's what I do.


We have several five gallon paint buckets around the house.  The kids have one attached to a rope on the tree house for hauling things up and down.  Each kid has their very own to use when we pick up pine cones each weekend.  (Their absolutely favorite thing to do.  Not!)  And I keep one on the front porch to use to water my ferns.  I keep it about 3/4 full and about once a week, I drop in a handful of Epsom salt.  (I read somewhere that it helps to keep your ferns green.)  Change your water before adding more salt, so it doesn't get too saline.
 

Then I simply set the fern in the bucket for at least half a day.  This gives the roots time to absorb the water as opposed to top watering where the water just runs right through.  Brilliant, huh?  Thank you very much!  If I think about them, I swap them out middle of the day.  If not, it's OK if they sit overnight.  This way, each plant is in the water about every other day.  And we all know that ferns have to have lots of water to survive the Southern heat and sun.  Well, at least now we all know that!


And, look!  You can't even see the fern in the bucket behind my little wicker settee, although I will move it when we are having company.
 
So, now you know how to keep your ferns beautiful and healthy all summer long.  So head right out and buy you some ferns and a paint bucket.  Ya' know what I mean, Fern?

**************************
 
I'm so glad you stopped by my neck of the woods!
Please take a moment to sign up to receive new posts by email.
I wouldn't want you to miss one crazy thing...

 

Tuesday, March 18, 2014

Ancient Chinese secret...

Remember the commercial for Whisk way back in the 70's?  The wife picks up her husband's shirts at the local dry cleaner and is a amazed at how clean they are.  "Ancient Chinese secret", the shop owner answers, while his wife hides the bottle of detergent in the back.
 
My blog post yesterday was about homeschooling.  Last Friday I shared a party I hosted and before that, it was genealogy.  Sometimes I think I suffer from a lack of focus, but then I think...  Wait.  Where was I? 
 
Oh, yeah.  Laundry.  Anyway, I was doing Gerald's shirts yesterday and realized that I have developed a pretty cool system that is probably worth sharing.  So here's my "ancient Chinese secret", although now, I guess it's not a secret any more!  Oh, well. 
 
For years, I sent Gerald's dress shirts to the dry cleaners.  He loved them so stiff that he had to force his arms through the sleeves.  Well, that's all well and good.  Until the price went up to about $2.25 a shirt.  He wears them six days a week.  You do the math.  (No, really.  You do it.  Brack and I worked on Roman numerals yesterday, and I just can't handle any more math!) 
 
Add to that the fact that often, as he was getting dressed for work, he would find a broken button, which meant that shirt came off for me to repair while he used another clean one.  Then the one I fixed the button on was all wrinkly.  Back to the cleaners it went.  He would also complain that the cleaners were shrinking them.  (The sleeves were getting shorter.  I don't think his arms were getting longer.  Now as for the neck, that's another story!  But I digress...)
 
So a couple of years ago, I decided to start doing them myself.  I developed this process and it works great.  No busted buttons, no shrinkage, and most importantly, no weekly laundry bill!
 
I wash his shirts on delicate and in cool water.  As soon as they are done in the spin cycle, I immediately get them out, shake them several times and hang them.  You have to get them out as soon as they finish spinning in order for this to work.  If they sit in the washer, they wrinkle.  (I stick them on the hooks that hold my ironing board until I have them starched, at which point I put them on hangers.  Duh.)   
 
 
While they are still wet, I starch them heavily, and I mean heavily.  I get between four and five shirts starched per bottle.  That's less than a quarter a shirt!  Woo Hoo!
 
Once they are starched, I hang them to dry.  I have a neat little rack in my laundry room, but you could hang them on a shower rod, as well.
 
 
See my little laundry assistant in the bottom right corner?  He works cheap.  A few scratches behind the ears and under the neck, and he's good to go. 
 
I usually do all this in the afternoon after we are finished with school.  It takes about 3 minutes to starch each shirt.  I let them dry over night.  (I have learned to put a beach towel underneath to catch any starch that drips.)  The next morning, they are stiff as a board and ready to be ironed!  I will admit, I don't do all my ironing at once.  It would just get smuched in the closet, and seriously, who has the time?  I pull out a shirt each morning, fill my iron with water, turn that puppy on high, and I can iron his shirt perfectly in less than five minutes.


I know.  Amazing, right?  Martha Stewart would be soooo impressed.
 
Couple of quick notes.  Once you finish, take a towel and wipe down the top of the ironing board so you don't have a build-up of starch that will dry and burn later on.  Trust me on this.  I speak from experience.  Also be sure that you don't need to iron anything else that day, 'cause your ironing board top is now sopping wet.  But that's ok!  Leave it up overnight and it will be dry and waiting for you the next day. 
 
If you do your shirts at home, you should give it a try!  Just be sure to help me keep it our little secret.  OK?  Yeah, my blog may be a little unfocused, but so is my life!  What about yours?!

P.S.  Ok.  So I just watched the old commercial on Youtube, and guess what?  It was Calgon, not Whisk!  I thought it was "Calgon, take me away."  I'm so confused.  No wonder I can't focus.  Anyway, whatever detergent you use, my "starch them while they're wet" trick really works! 

*********************************


I'm so glad you stopped by my neck of the woods!
Please take a moment to sign up to receive new posts by email.
I wouldn't want you to miss one crazy thing...
 
SITE DESIGNED BY PRETTYWILDTHINGS